Difference between revisions of "Register your devices"
From Awesome Baozam
(→Device registration) |
(→Device registration) |
||
| Line 4: | Line 4: | ||
A link between the '''Baozam device''' and its '''owner''' is provided with a '''Baozam card''' that is attached to each device. This card has a number and PIN-code by entering which the user declares himself as the '''owner''' of the device and binds the device with his account. <br> '''The card can be used only once.''' <br> | A link between the '''Baozam device''' and its '''owner''' is provided with a '''Baozam card''' that is attached to each device. This card has a number and PIN-code by entering which the user declares himself as the '''owner''' of the device and binds the device with his account. <br> '''The card can be used only once.''' <br> | ||
Registration procedure:<br> | Registration procedure:<br> | ||
| − | *Log in into your account on baozam.net | + | *Log in into your '''Baozam account''' on baozam.net |
*In main menu choose '''Configuration → Device Registration''' | *In main menu choose '''Configuration → Device Registration''' | ||
| − | [[File:Fig1 device registration1.png | + | [[File:Fig1 device registration1.png|Fig. 1. Device Registration Menu]] |
*A device '''registration form''' will appear on the screen. | *A device '''registration form''' will appear on the screen. | ||
| − | [[File:Fig2 device registration window.png | + | [[File:Fig2 device registration window.png|Fig. 2. Device Registration Form]] |
*Unpack your '''Baozam device''' and find the '''Baozam card''' (the figure shows an example of a '''people counter''' with a '''card''') (fig.3) | *Unpack your '''Baozam device''' and find the '''Baozam card''' (the figure shows an example of a '''people counter''' with a '''card''') (fig.3) | ||
| − | [[File:Fig3 device registration ppl ctr w card.png | + | [[File:Fig3 device registration ppl ctr w card.png|Fig. 3. Baozam device with card]] |
*Erase the '''scratch strip''' from the card. | *Erase the '''scratch strip''' from the card. | ||
| − | [[File:Fig4 device registration card stripe rmvd.png | + | [[File:Fig4 device registration card stripe rmvd.png|Fig. 4. Baozam card without scratch strip]] |
*Fill form fields with '''serial number''' of the '''Baozam card''' and '''PIN-code'''. | *Fill form fields with '''serial number''' of the '''Baozam card''' and '''PIN-code'''. | ||
| − | [[File:Fig7 device registration form fill.png | + | [[File:Fig7 device registration form fill.png|Fig. 6. Fill the form]] |
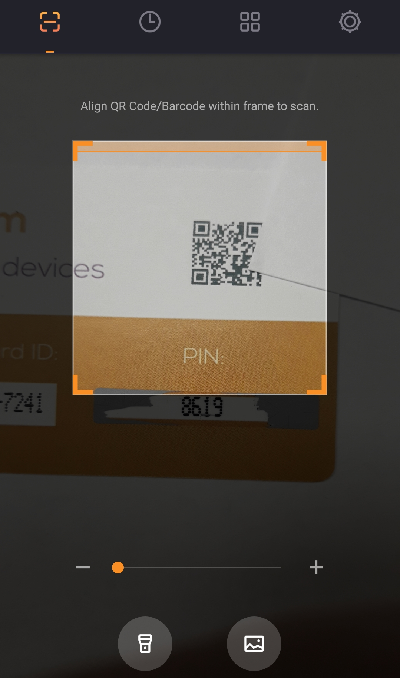
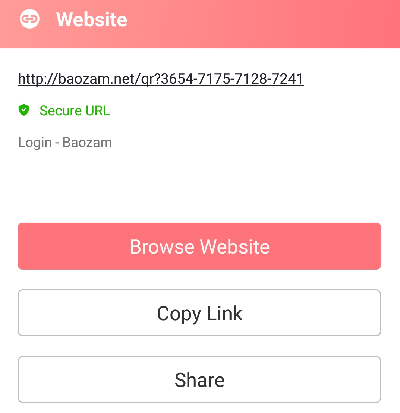
*'''Other way. '''To go to the registration form '''quickly''' and enter the card number you can use the link in the '''QR-code''' printed on the card. Use the code scanning program and follow the link. <br>'''Attention!''' You must first log into your '''Baozam account''' on the device with which you scan the '''QR-code''' and follow the link. | *'''Other way. '''To go to the registration form '''quickly''' and enter the card number you can use the link in the '''QR-code''' printed on the card. Use the code scanning program and follow the link. <br>'''Attention!''' You must first log into your '''Baozam account''' on the device with which you scan the '''QR-code''' and follow the link. | ||
| − | [[File:Fig5 device registration card QR scanner.png | + | [[File:Fig5 device registration card QR scanner.png|Fig. 7. Scan QR-code]] |
| − | [[File:Fig6 device registration card QR link.png | + | [[File:Fig6 device registration card QR link.png|Fig. 8. Follow the link]] |
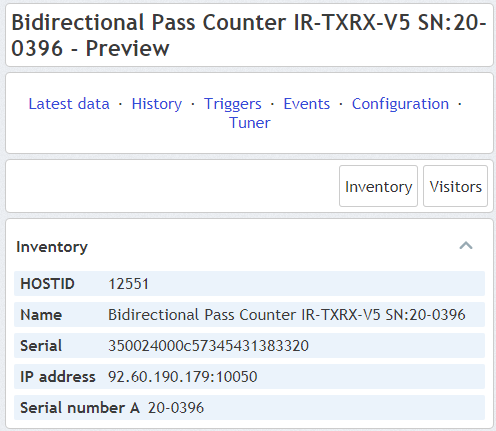
*You will be informed about the name, serial number and basic parameters of the attached device. (fig8) | *You will be informed about the name, serial number and basic parameters of the attached device. (fig8) | ||
| − | [[File:Fig8 device success added.png | + | [[File:Fig8 device success added.png|Fig. 8. Device information]] |
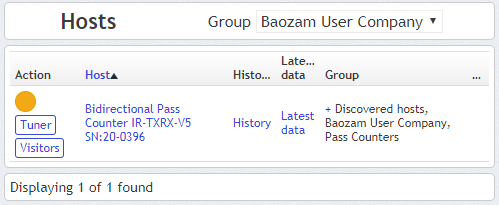
*Now you can check the status of your '''inventory'''. | *Now you can check the status of your '''inventory'''. | ||
| − | [[File:Fig9 inventory check1.png | + | [[File:Fig9 inventory check1.png|Fig. 9. Inventory Menu]] |
| − | [[File:Fig10 inventory check2.png | + | [[File:Fig10 inventory check2.png|Fig. 10. Inventory]] |
Revision as of 15:38, 6 December 2018
Device registration
Once you have already successfully created your Baozam account, it's time to add your first Baozam device.
The registration procedure for all Baozam devices is the same. At the production stage each Baozam device is registered in the device database. Each device is already fully functional and can work with cloud services. But it still does not have an owner and nobody can access to its data and control functions.
A link between the Baozam device and its owner is provided with a Baozam card that is attached to each device. This card has a number and PIN-code by entering which the user declares himself as the owner of the device and binds the device with his account.
The card can be used only once.
Registration procedure:
- Log in into your Baozam account on baozam.net
- In main menu choose Configuration → Device Registration
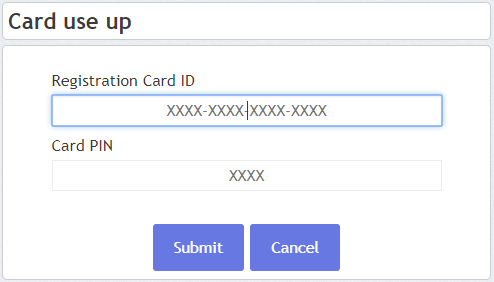
- A device registration form will appear on the screen.
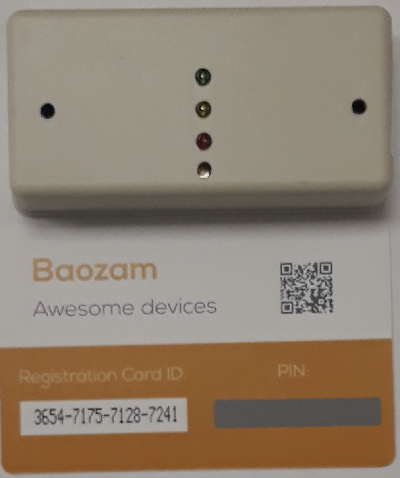
- Unpack your Baozam device and find the Baozam card (the figure shows an example of a people counter with a card) (fig.3)
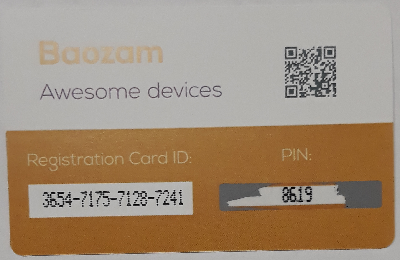
- Erase the scratch strip from the card.
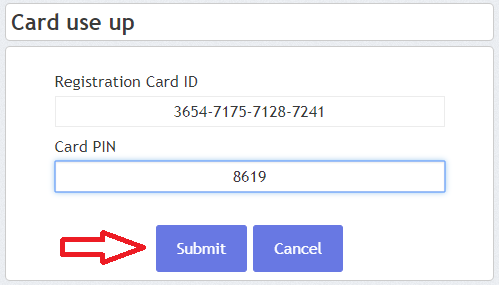
- Fill form fields with serial number of the Baozam card and PIN-code.
- Other way. To go to the registration form quickly and enter the card number you can use the link in the QR-code printed on the card. Use the code scanning program and follow the link.
Attention! You must first log into your Baozam account on the device with which you scan the QR-code and follow the link.
- You will be informed about the name, serial number and basic parameters of the attached device. (fig8)
- Now you can check the status of your inventory.

