Bidirectional pass counter v.1.x
From Awesome Baozam
Contents
Description
The counter consists of two modules:
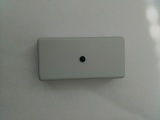
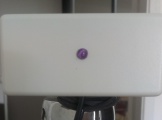
- emitter - with one LED in the middle of the front panel (Fig. 1).
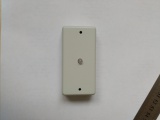
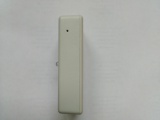
- receiver - module with LED in the middle of the front panel and two holes on the edges of the front panel (Fig. 2). Also on this module top you can find a narrow hole to access the button to activate the WiFi setting mode (Fig. 3).
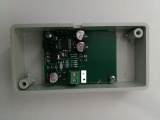
Both units have a rectangular hole for the power cord at bottom side (Fig. 4).
Specifications
| Maximum distance between emitter and receiver | 6 meters |
| IR wavelength | 940 nm |
| Modulation frequency of the IR signal | 38 kHz |
| Power supply | 5 — 24 V DC |
| Communication standard | 802.11b/g/n (WiFi) network with a password only |
| Used communication protocols | TCP / IP, TLS 1.2, HTTPS, WebSocket |
| Power Consumption | |
| emitter | no more than 100 mW |
| receiver | 1 W |
| Operating temperature range | 0°C — 40°C, with relative humidity of 80% |
| Dimensions (WxHxD) | 80mm x 40mm x 20mm |
| Material hull | ABS plastic |
| Color | grey, black |
Installation
- Connect the power cords to the modules. If you connect the emitter power is necessary to observe the polarity ( "+" - near the wall, Fig. 5).
- Fix the modules on both sides of the aisle at a height of 1.20 — 1.40 meters. The receiver must be placed horizontally (to account for the direction of the input/output).
- Connect the power supply.
- The efficiency of the emitter can be checked using the smartphone camera. When viewed from the front side on the emitter LED from a short distance through the smartphone's camera, LED of running emitter will be painted in red-blue/purple color (Fig. 6).
- Receiver LED will flashing red and/or green in the different modes:
- Normal: the green every 5 seconds and/or at the intersection of the beam visitor;
- Setup mode: the green 10 Hz;
- Overlap beam: frequent blinking red (~ 10 Hz). The mode is set when there is no signal from the transmitter for 25 seconds;
- There is no WiFi network: the red every 5 seconds.
WiFi Setup
All devices use the same WiFi Setup procedure. The difference is in where placed and how the init setup button looks. At the pass counter receiver:
- version 2: the top has a narrow hole to access the button to activate the WiFi setting mode (Fig. 3). Button is pressed with a toothpick. Sometimes an angle. When pressed felt (not heard) a click.
- version 3: the button is inside the hole under three diods on the front of receiver.
WiFi Setup
Setting and checking the operation of the device
- Go to the page at https://baozam.net
- In the "Inventory" section, select the desired device.
- Over the device page, click on the link «Tuner». When the next transfer data to the cloud the device will go into the settings mode.
- The device sends data to the cloud every five (5 minutes). The device immediately reports about cutting/opening the beam, turning on. To avoid to wait up to five minutes, you can: a) cut off the beam - a message in 25 seconds, b) turn off/on the device.
- After the device come into the setup mode you will get a message at the «Tuner» page, and all device parameters will be displayed.
- Hovering the cursor over the "blue" parameter causes the appearing of «Stream & Monitor» buttons.
- Stream - on/off sending this parameter to the cloud.
- Monitor - on/off immediate displaying parameter in the "Monitor" box at the page.
- You should check
- Entering the emitter beam on the receiver sensors (parameters «left sensor» & «right sensor»). Turn on sensor monitors. Normal values range 5 - 6. If the reading is less than 5, the emitter and receiver are not aligned or something overlaps the beam. Adjust the alignment, clean the beam path. If values are greater than 7 look for the source of noise.
- The direction of the entrance/exit. By default, the input direction is from left to right relative to the receiver. Turn on monitoring parameter «count_in_tmp». Cross the beam ... change the direction by using the «Mode Control» button. Use the drop-down button «LEFT to RIGHT is ENTER» or «LEFT to RIGHT is EXIT» to select the desired direction.
- Important! If you change the direction of the passage, be sure to save your changes («Settings» button - «Save»). Otherwise, when you turn off the device power your settings will be lost.
